> For the complete documentation index, see [llms.txt](https://docs.cwicly.com/llms.txt). Markdown versions of documentation pages are available by appending `.md` to page URLs; this page is available as [Markdown](https://docs.cwicly.com/woocommerce/product-variations.md).
# Product Variations
Product Variations refer to the different attributes of an item, such as colour or size.
A Product with its variants can be grouped together on a single product page.
## Add New Product
* Navigate to the WordPress dashboard.
* Find Products and click to open.
* Select "Add New" to add a new product.
* Input Product Name.
* Select "Set product image".
* Select required Image for the Product.
* Click "Set product image" to save selected Image.
* Input required description.
* Click "Product data" to open dropdown.
You can choose the Product data you require. In this example case we are adding a Variable product.
* Choose required data (Simple product, Grouped product, External/Affiliate product, Variable product).
* Add the SKU (stock keeping unit, a unique identifier for each individual product).
* In the example case, the SKU is the same as the Name.
* Open the Attribute tab.
* Open Inventory dropdown.
* Select required Custom product attribute in dropdown (Colour, Material, Size etc).
* In this example, we are selecting Colour as our product attribute.
* Click "Add" to add colour attribute(s).
* Choose required Colour(s) in dropdown.
* Tick "Used for variations" box.
* Click "Save attributes" to save.
* Add the other attributes required for the selected product.
* An example is shown below.
* Navigate to Variations and click to open the "Add variation" dropdown.
* Choose Create variation from all attributes.
* Click "Go".
* A popup will ask you if you want to link all variations.
* Click "Ok" to accept.

* A new popup will tell you how many variations have been added.
* Click "OK" to accept.

* You will now be able to visualise all the variations you have created.
* Click "Add Price" if some of your variations do not have prices.
* In the modal, add the required price and click "Add prices".
* If you are happy with the your new product, click "Publish".
* In your Products page, you will now see the added item.
## Variation Swatch
The Variation Swatch block gives you the possibility to create an aesthetic and professional way to select attributes for variation products.
Instead of ugly product drop downs, you can design the product variation select options fields with custom images, colours, and size.
## Create Swatch Variation for a Single Product

{% hint style="info" %}
Remember to set up your Swatch Variation on a new Single Product page.
{% endhint %}
### Single Product Page
* Navigate to the WordPress dashboard.
* Open Cwicly.
* Open Themer and in the Templates tab click "Add Custom Template" button.
* This opens a "Single Products Page" modal.
* Add required name.
* Click "Create".
* Find the new template in the Themer.
* Click "Visibility Conditions" icon.
* Click "+" to add a new Visibility Condition.

* In the "Single Product Page Visibility Conditions" modal:
* Set Visibility Condition to "Show if".
* Set Type to "Singular".
* Set Including to "Products".
* Set Product Type to "All".
* Click "X" to close Single Product Page Visibility Conditions modal.
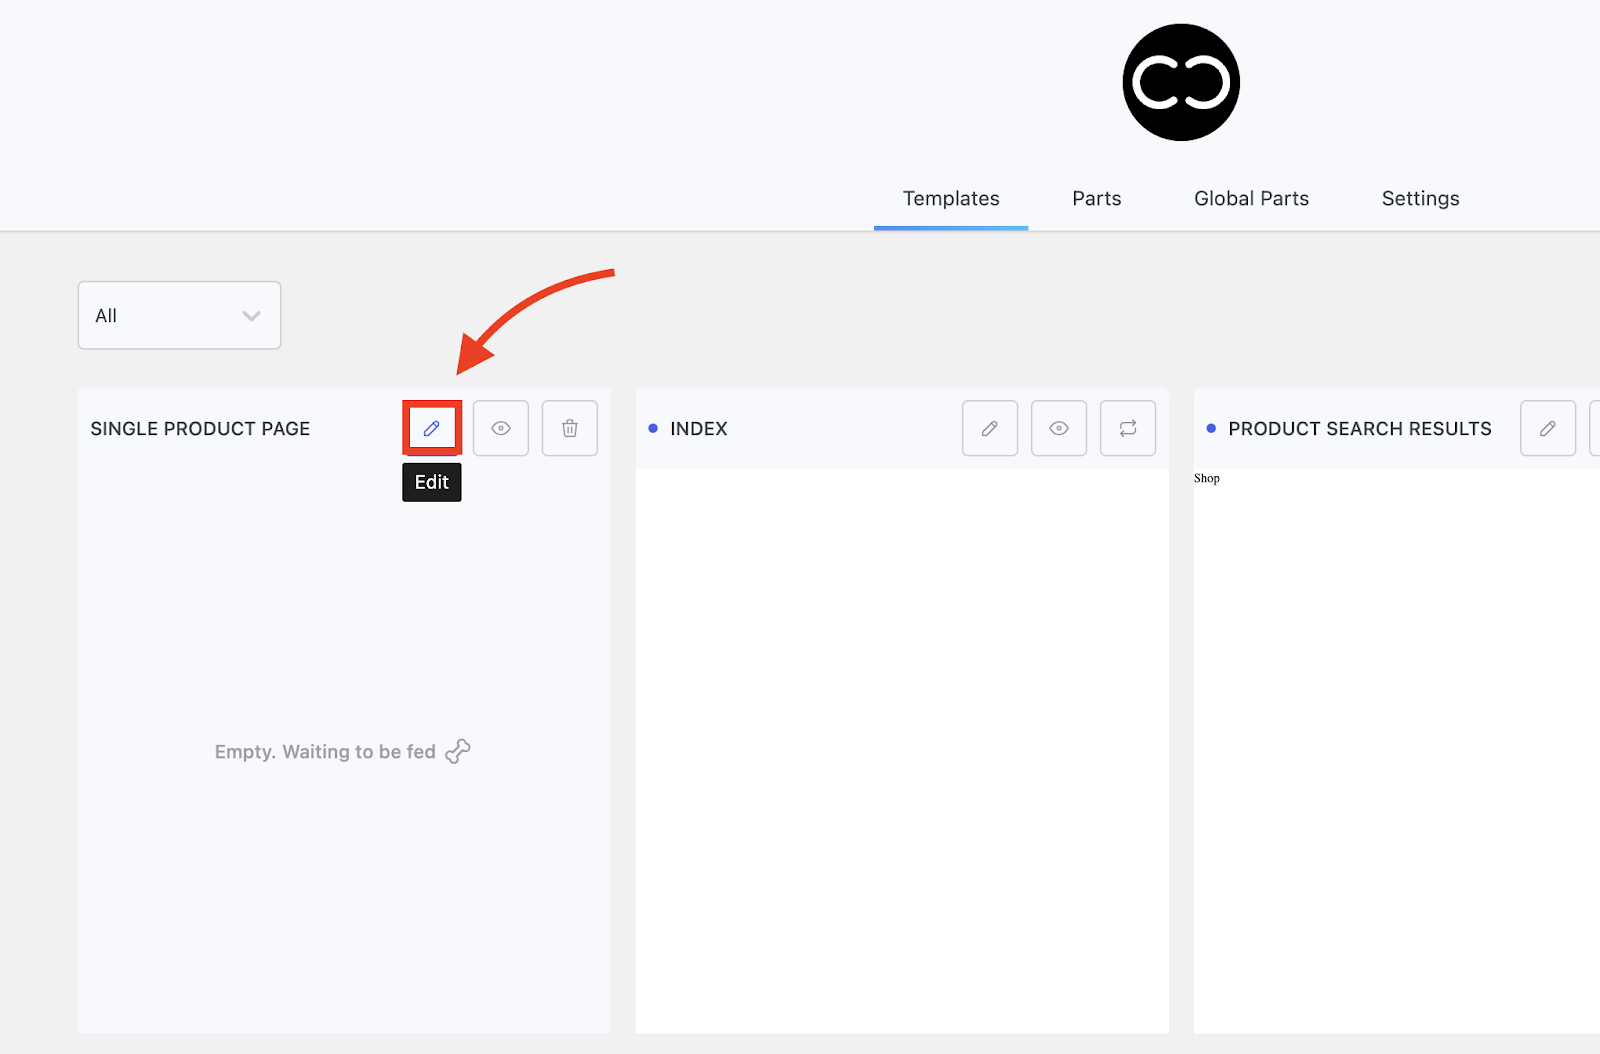
* Click "Edit" icon to open template in the editor.
* This opens the Single Page Product page in the editor.
* Add a Section to contain your Variation Swatch.
* With the Section selected, add a Repeater.
* In the Primary tab, set Source to "Variable Product".
* The repeater will not be active until you have added a variable product.
* Click to open "Dynamic Preview".
* Choose the required variable product in the dropdown in order to preview your swatches.
{% hint style="info" %}
You need to create your variable products (see abover) before you can do this.
{% endhint %}
* Click "+ Add Block".
* Add a Div to your repeater.
* In the Primary tab, in the Layout tab, set Flex, Centre, Space-between.
* With the Div selected, add a Paragraph.
* With Paragraph selected, click Dynamic Values.
* In the Dynamic Content modal, set Source to WooCommerce.
* Set WooCommerce to Variation Label.
* Select the Div inside the Repeater and add a Div.
* This will act as a container for all Variable Swatch blocks
* In the Layout tab of the Primary tab, set direction to Flex and Column Gap to 5px.
### Add a Colour Swatch
Let's add our first Swatch, for instance a Colour swatch.
* With the Div collected, add a Swatch block.
* In the Settings tab of the Primary tab, set Attribute to Colour (General).
Now, don’t worry if you don’t see anything, this is because the swatch items don’t have a size yet. Simply toggle Show Text or add a size to your swatch elements to see them appear.
* For toggle: Enable "Show Text".
Or add Size:
* In the Design tab, open the Sizing tab.
* Set required size (height and width).
{% hint style="info" %}
If you still don’t see anything, make sure you’ve set up your attributes in the WooCommerce Attribute menu or check our documentation for help setting this up.
{% endhint %}
* In the Design tab, open the Radius and Width tab.
* Add required radius and width.
* The first variable swatch has been created.
### Add a Size Swatch
Let's add a "Size" Swatch.
* With the Swatch Div selected, add a Swatch.
* In the Settings tab of the Primary tab, set Attribute to "Select" in the dropdown.
* You can manouvre the Select drop down at this stage to see how it looks.
Let's add some styling.
* With the Swatch selected, in the Margin and Padding tab of the Design tab, add required padding. (for instance, 3px top and bottom, 8px left and right).
* You can arrange the borders (for instance, 5px radius, 1px width) for a more aesthetic look.
* How about beautifying the typography (Typography tab, Design tab, Font style, size, weight).
### Add a Material Swatch
Now let's add a material swatch with images of different materials.
* With the Swatch Div selected, add a Swatch block.
* In the Settings tab of the Primary tab set Attribute to "Image".
{% hint style="info" %}
You will not see your material swatch until you have set a size.
{% endhint %}
* In the Sizing tab of the Design tab, set required height and width (for instance 50px height, 50px width).
Now we need to adjust the images to see the detail.
* Open the Image tab in the Design tab.
* Open the Sizing tab and set required size (for instance "Cover").
The Swatches are a little cramped, so let's set some spacing.
* Select the first Div of the Repeater.
* In the Margin and Padding tab of the Primary tab set a 15px lower Margin or adjust as required.
The page below gives you an idea of how your page will look when you include the swatches you have set up.