> For the complete documentation index, see [llms.txt](https://docs.cwicly.com/llms.txt). Markdown versions of documentation pages are available by appending `.md` to page URLs; this page is available as [Markdown](https://docs.cwicly.com/cwicly/components/properties-add/icon-property.md).
# Icon Property
The Icon Property allows you to configure your icon property. You can input a Name and choose a suitable icon and choose whether or not to include it in the CSS so that you can use it in a List block.
* Open the Components Properties modal by clicking "+" icon in the Block inspector.
* Select the Icon Property you wish to configure.
## Connect
The Icon Property needs to be connected for it to be applied to the canvas.
{% hint style="info" %}
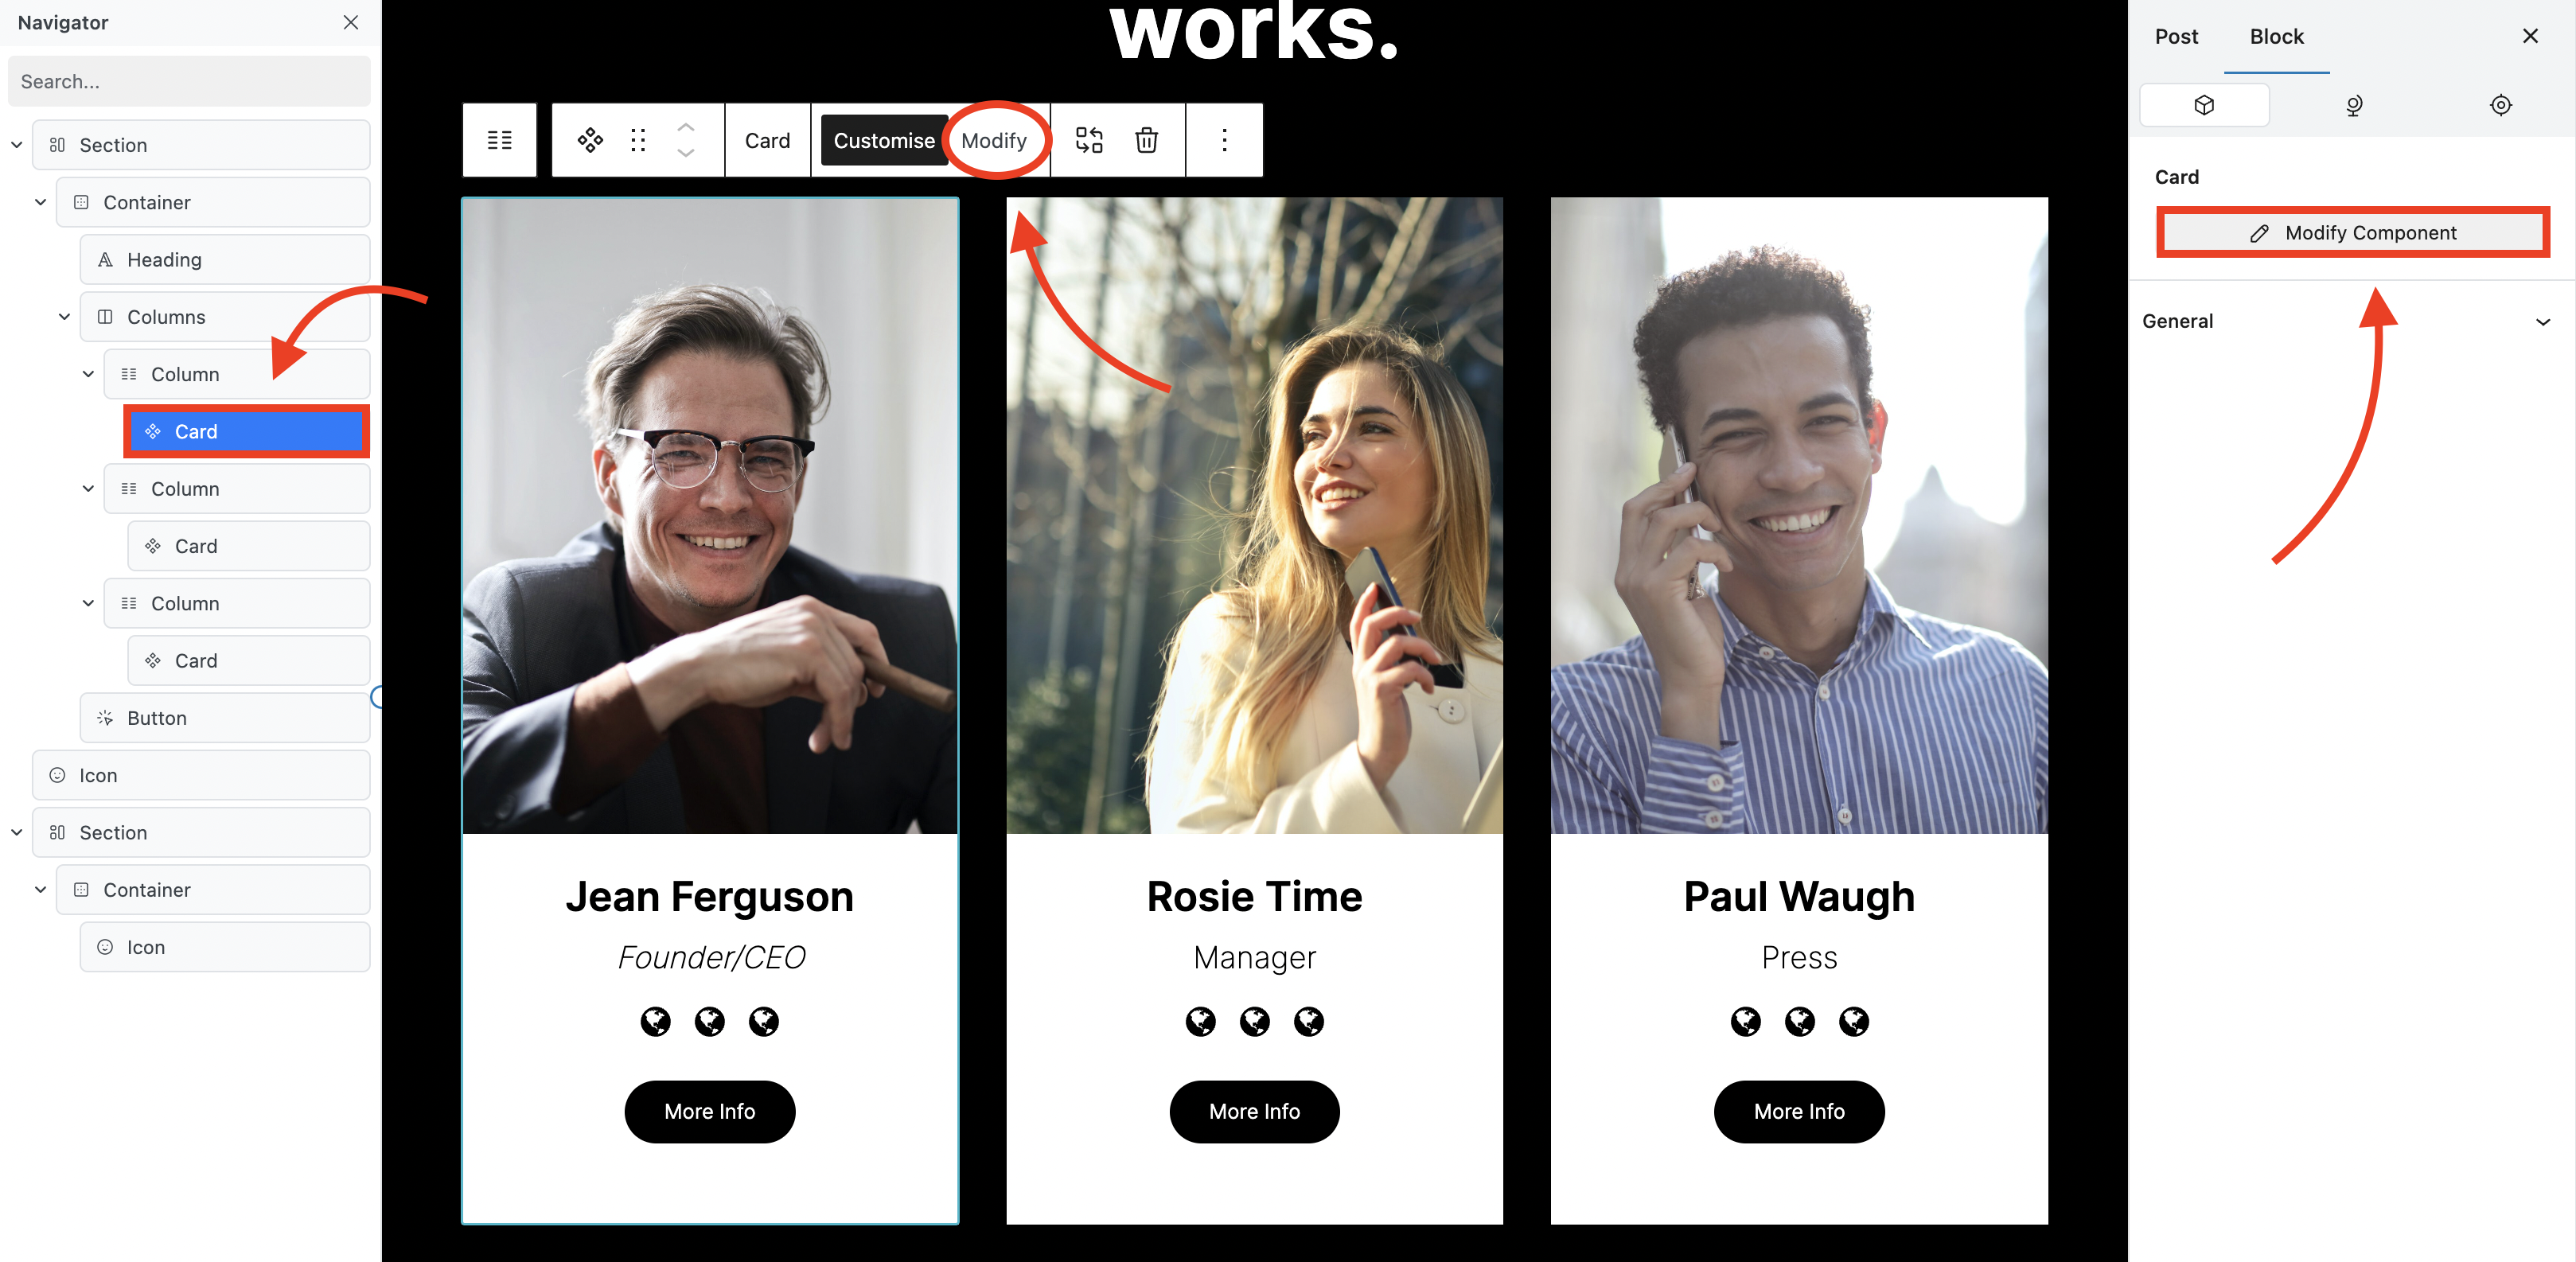
You need to select "Modify" in the Toolbar or Block Inspector for the blocks that make up a particular component to be visible.
{% endhint %}
* Select the Component to which you want to connect the Icon Property.
* Select "Modify" in the toolbar or the Block Inspector.
* The blocks contained in the component are now visible in the navigator.
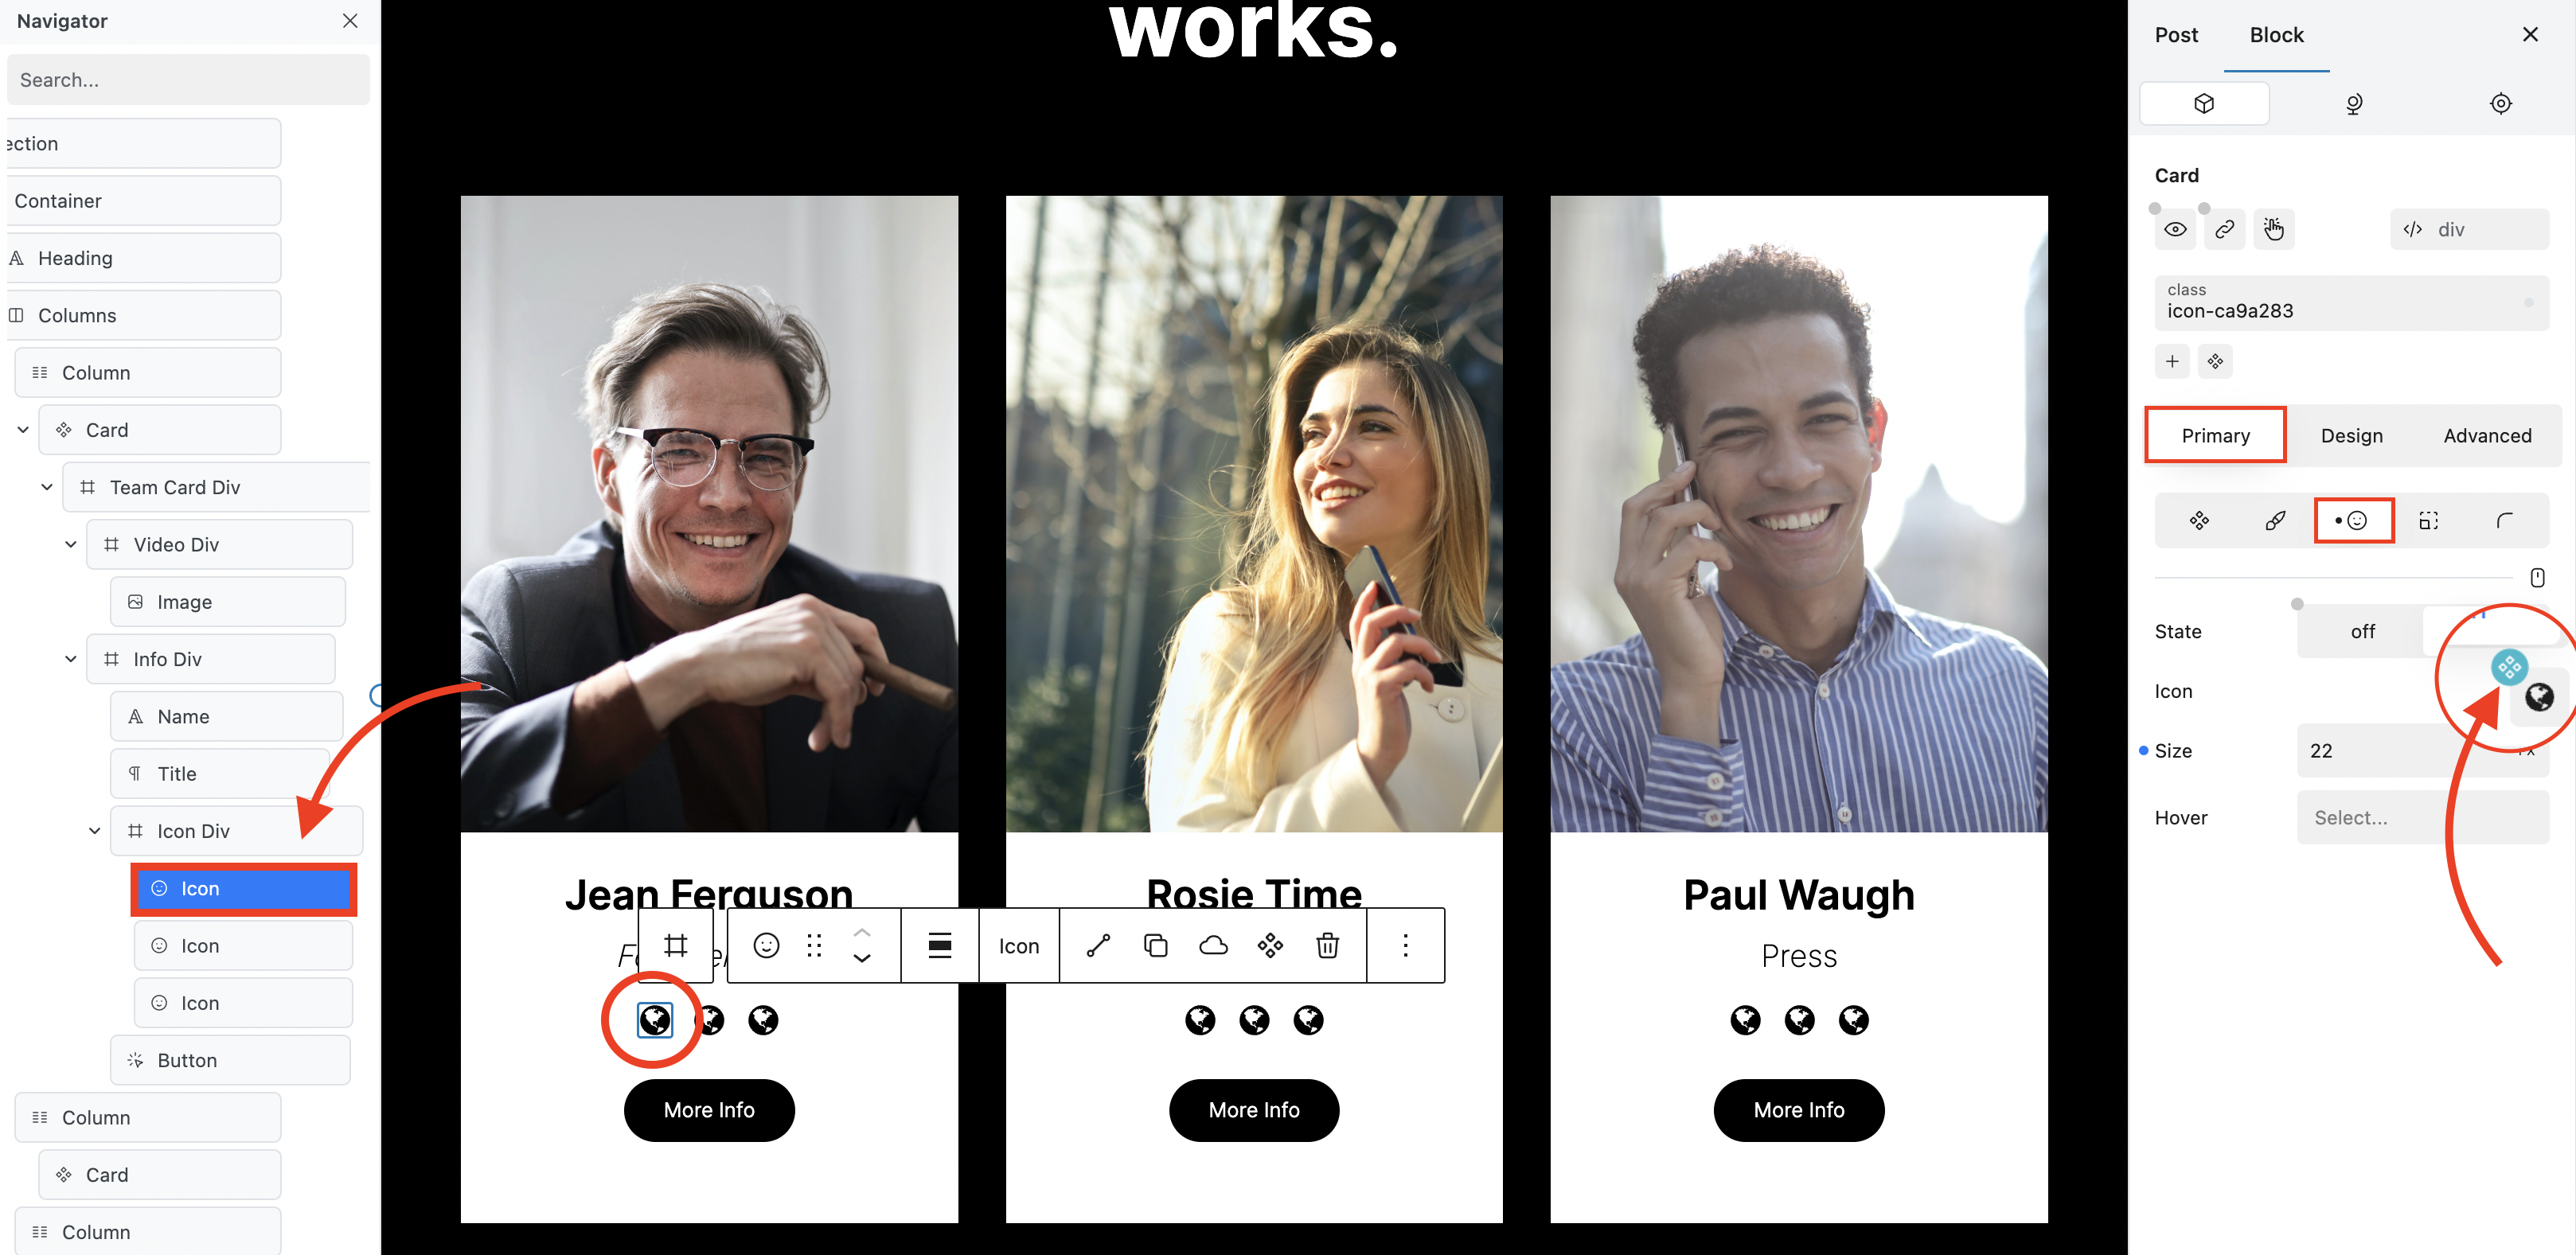
* Find and select the Icon property you wish to connect in the navigator.
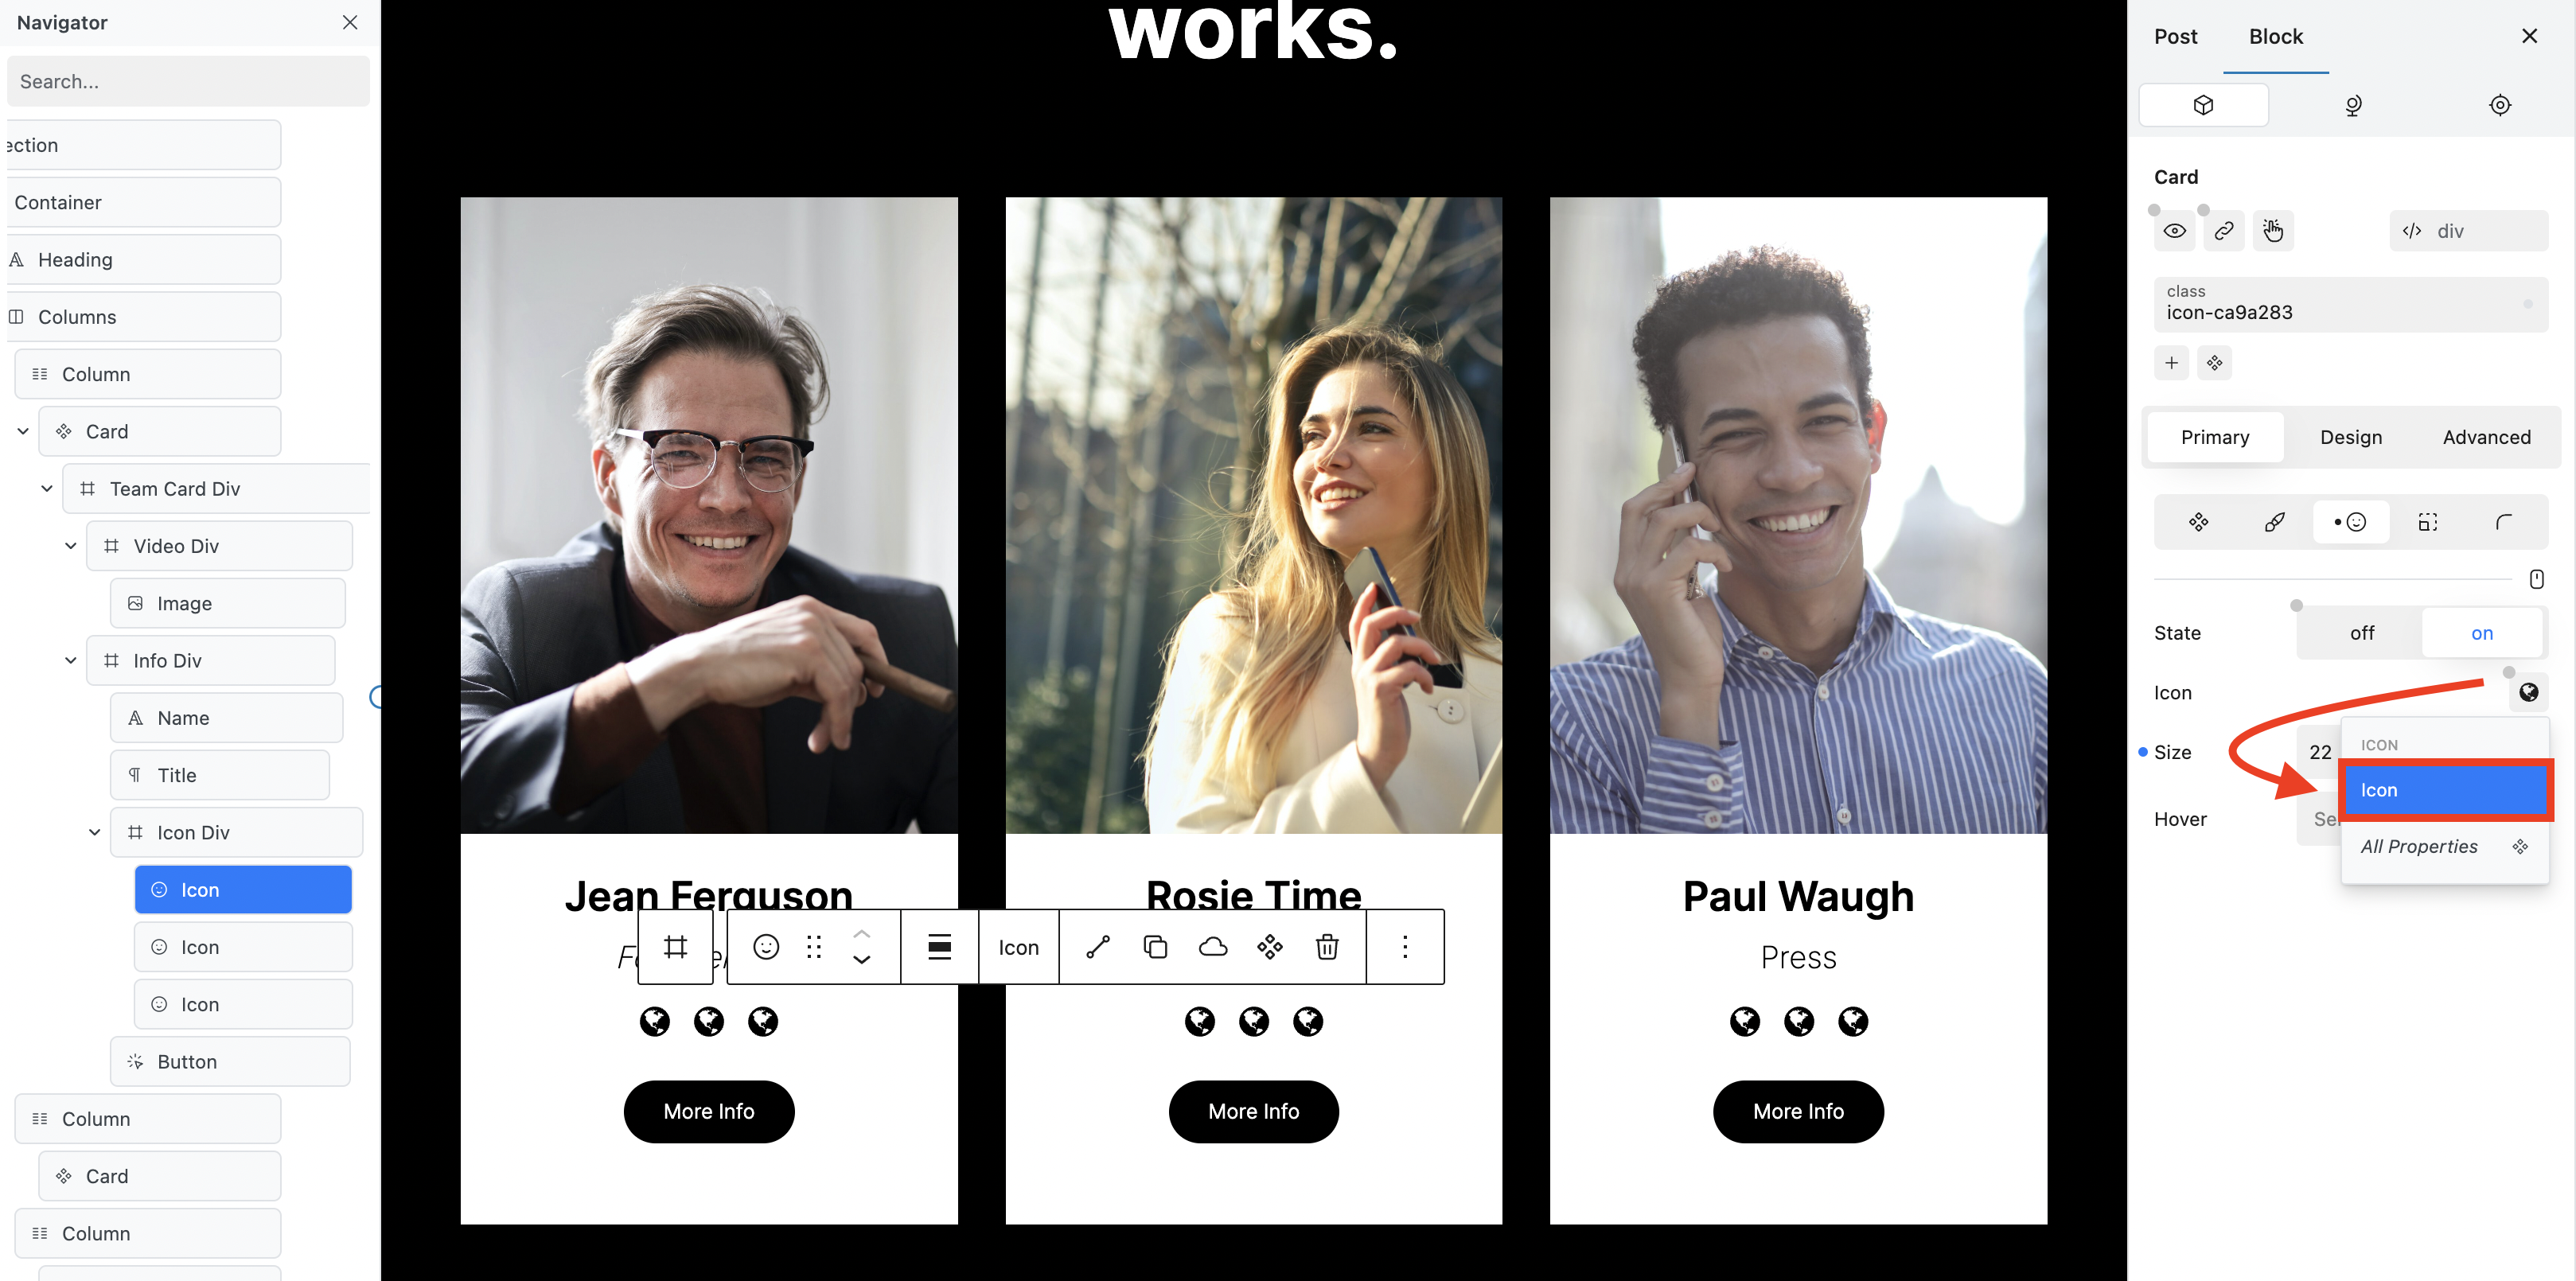
* In the Components tab of the Primary tab, click the Component icon above the Icon to open the Component Properties modal.
* Select the required Icon Property in the dropdown.
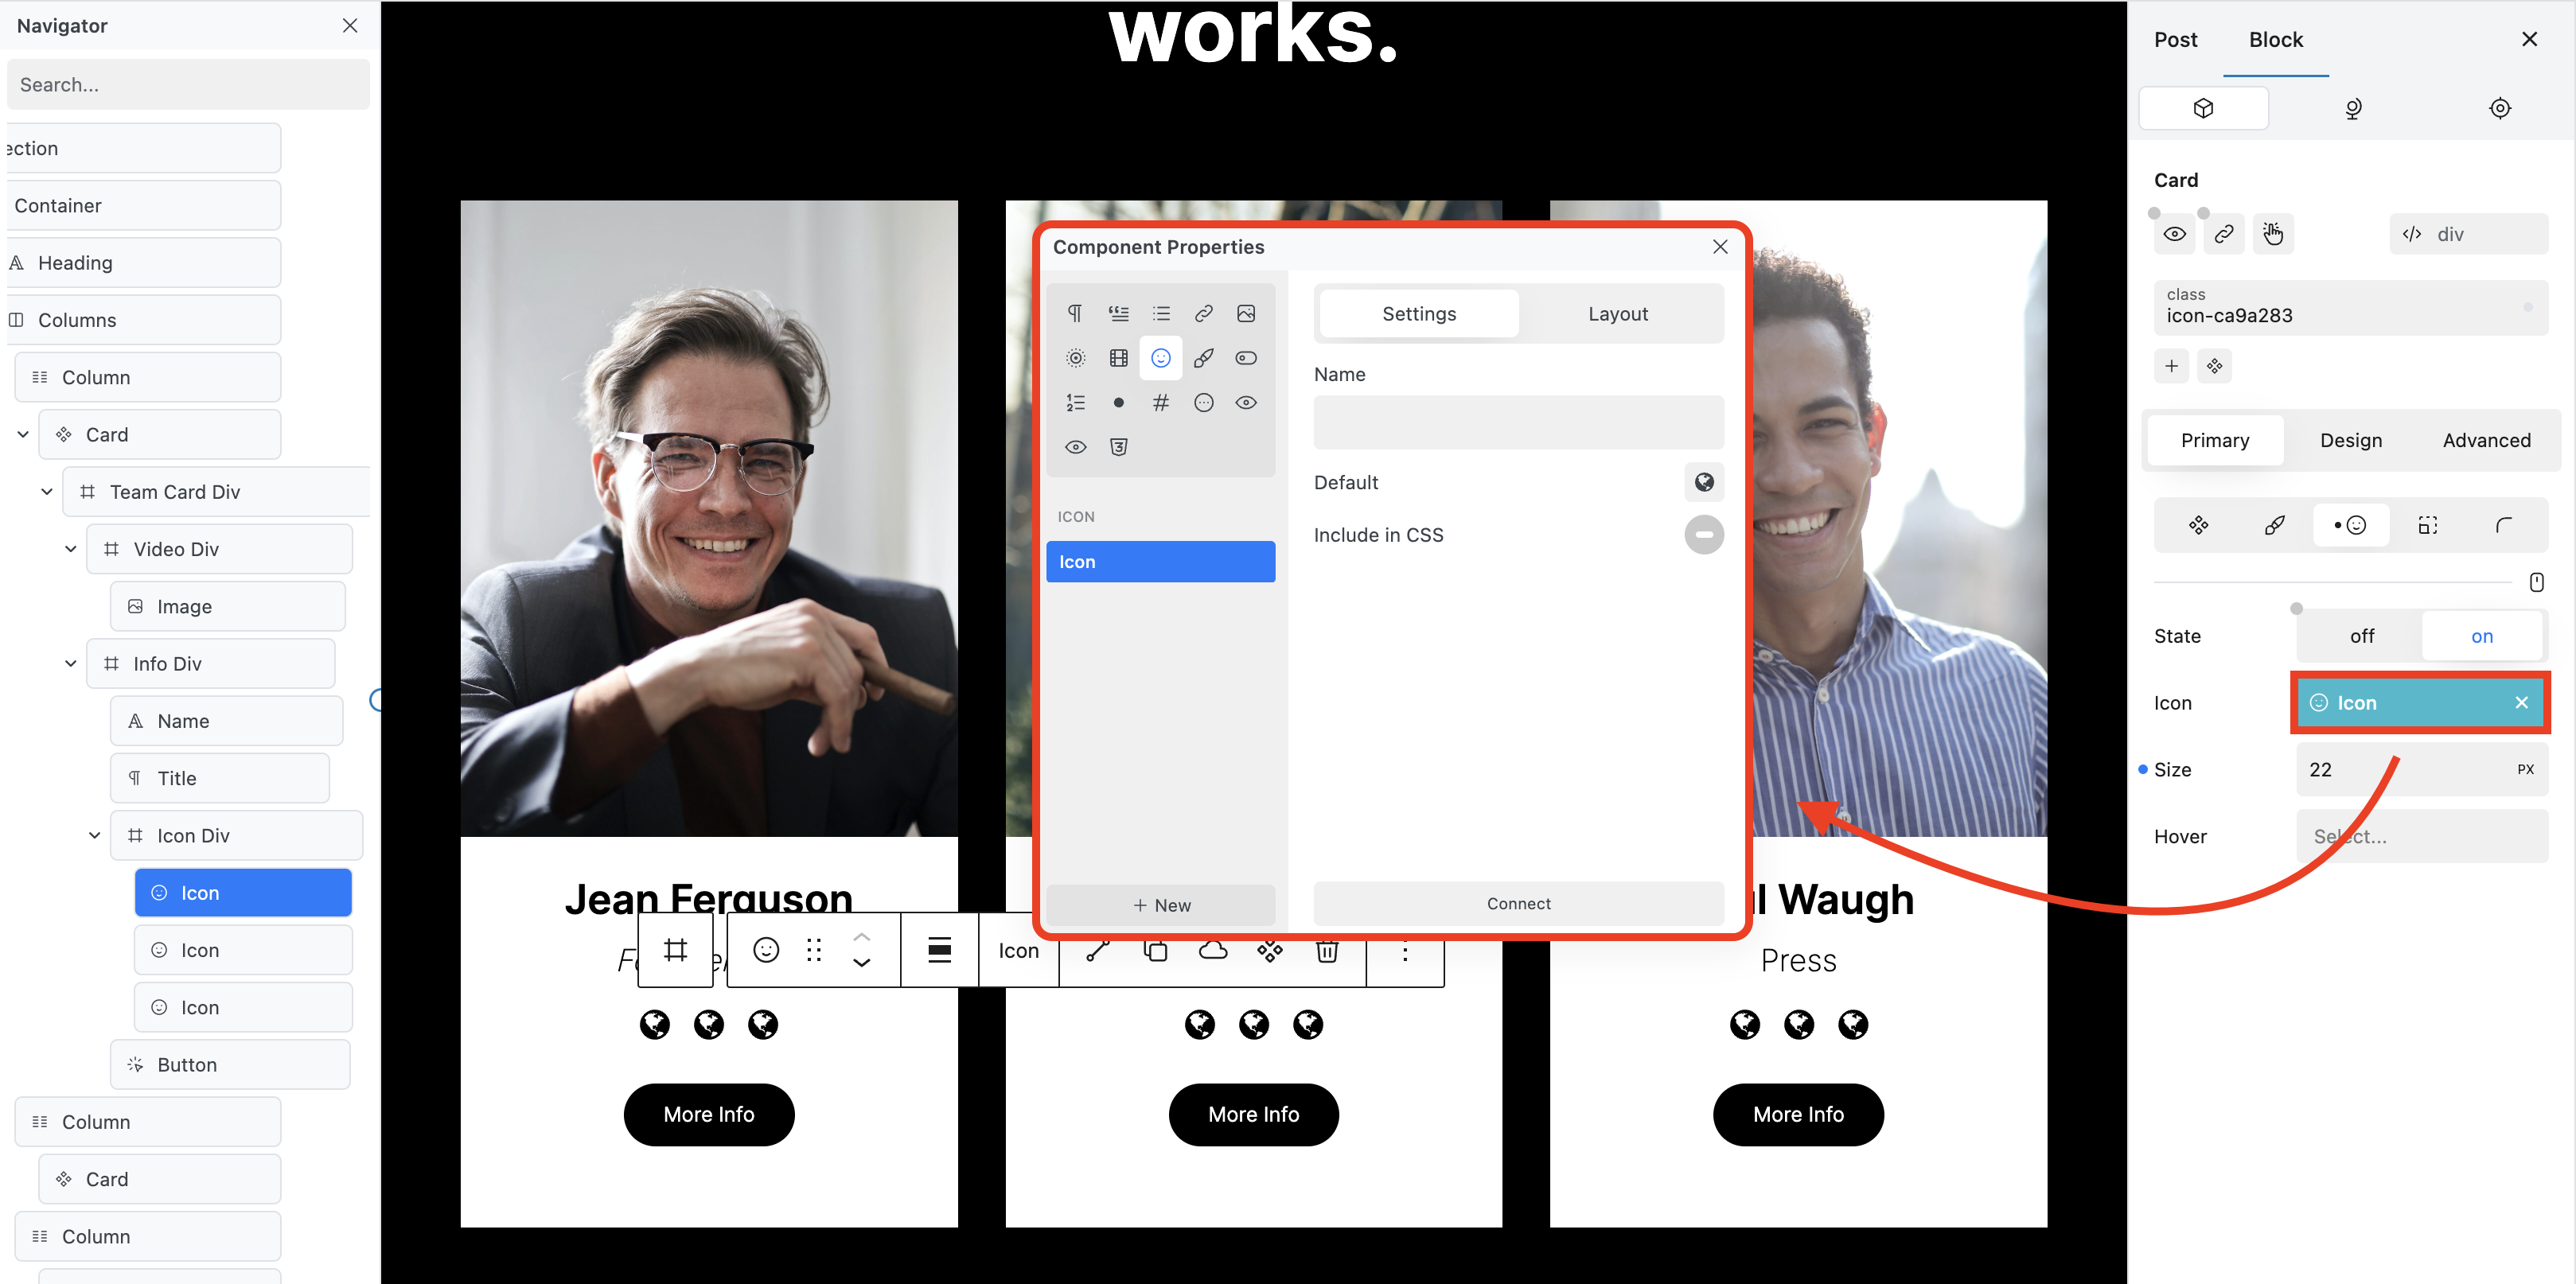
* The Icon Property will now be visible in the Content field in green which indicates that it is connected.
* Click Icon Property to open the Component Properties modal if you wish to make any adjustments.
* To customise, select icon block on the canvas or in the navigator.
* In the Block Inspector open Panel by clicking the Icon.
* Select required icon.
The required icon will now be visible on the canvas.
## Name
Allows you to label the selected Icon property.
* Open the Component Properties modal.
* Select required Icon property.
* Input suitable label name to Name field.

The required label will now be visible in the Block Inspector next to the Icon field.
## Default
Allows you to set suitable default text to your Icon component.
* Open the Components Properties.
* Select required Icon property.
* Find required icon in the Icon Libraries or using the Search bar.

The Selected Icon will now appear in blue in the Default field.

And this is how the required Default icon will look on the canvas.
## Include in CSS
This allows you to use a specific Icon in a list block. This means that you do not have to include all your icons in the CSS but only those that you enable.
* Toggle on "Include in CSS" to include the selected Icon Property in a list block.