# Settings
The Columns Settings panel allows you easy access and control over the structure and alignment of the contents of your page.
* Select a Columns block.
* In the Primary tab of the Block Inspector, open the Settings tab.
### Manual Grid
When all Auto properties are deactivated in the Grid Settings of the columns block, the grid layout will rely on a fully manually created grid layout through the Grid Editor.
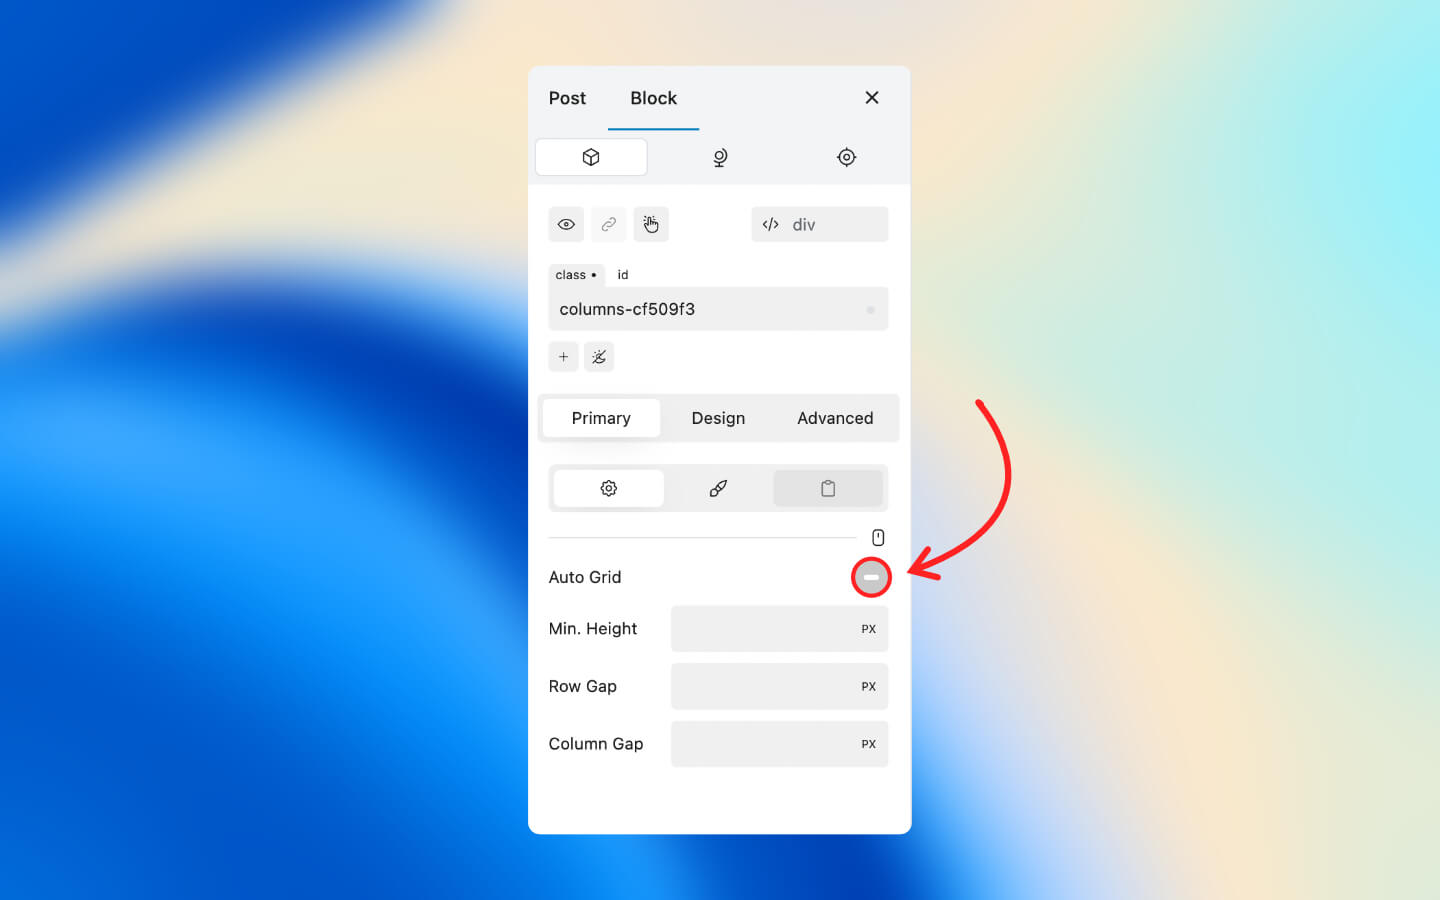
## Auto Grid
The Auto Grid property allows you to define whether the columns block should automatically repeat the layout that is used for the first row over to the next rows (if there are enough [`column`](https://docs.cwicly.com/blocks/column) blocks).
With Auto Grid selected, the module button allows you to add the number of modules you set for the row. A module can be thought of as a placeholder for your [`column`](https://docs.cwicly.com/blocks/column) blocks.
{% hint style="info" %}
You cannot add more modules than the number of fractions you have set.
{% endhint %}
{% hint style="warning" %}
When the Auto Grid property is active, only the first row of the layout built in the [Grid Editor](https://docs.cwicly.com/blocks/columns/columns-1) will be used as a pattern. For this reason, Cwicly will not apply/modify your layout if you have set more than one row to the Grid Editor.
{% endhint %}
{% content-ref url="columns-1/auto-grid" %}
[auto-grid](https://docs.cwicly.com/blocks/columns/columns-1/auto-grid)
{% endcontent-ref %}
{% content-ref url="columns-1" %}
[columns-1](https://docs.cwicly.com/blocks/columns/columns-1)
{% endcontent-ref %}
## Auto Template
The Auto Template property allows the browser to handle the responsiveness of the Columns layout, showing fewer columns on smaller devices, and more columns on bigger devices.
{% hint style="warning" %}
The Auto Template property will only appear if the Auto Grid property is active.
{% endhint %}
{% content-ref url="columns-1/auto-template" %}
[auto-template](https://docs.cwicly.com/blocks/columns/columns-1/auto-template)
{% endcontent-ref %}
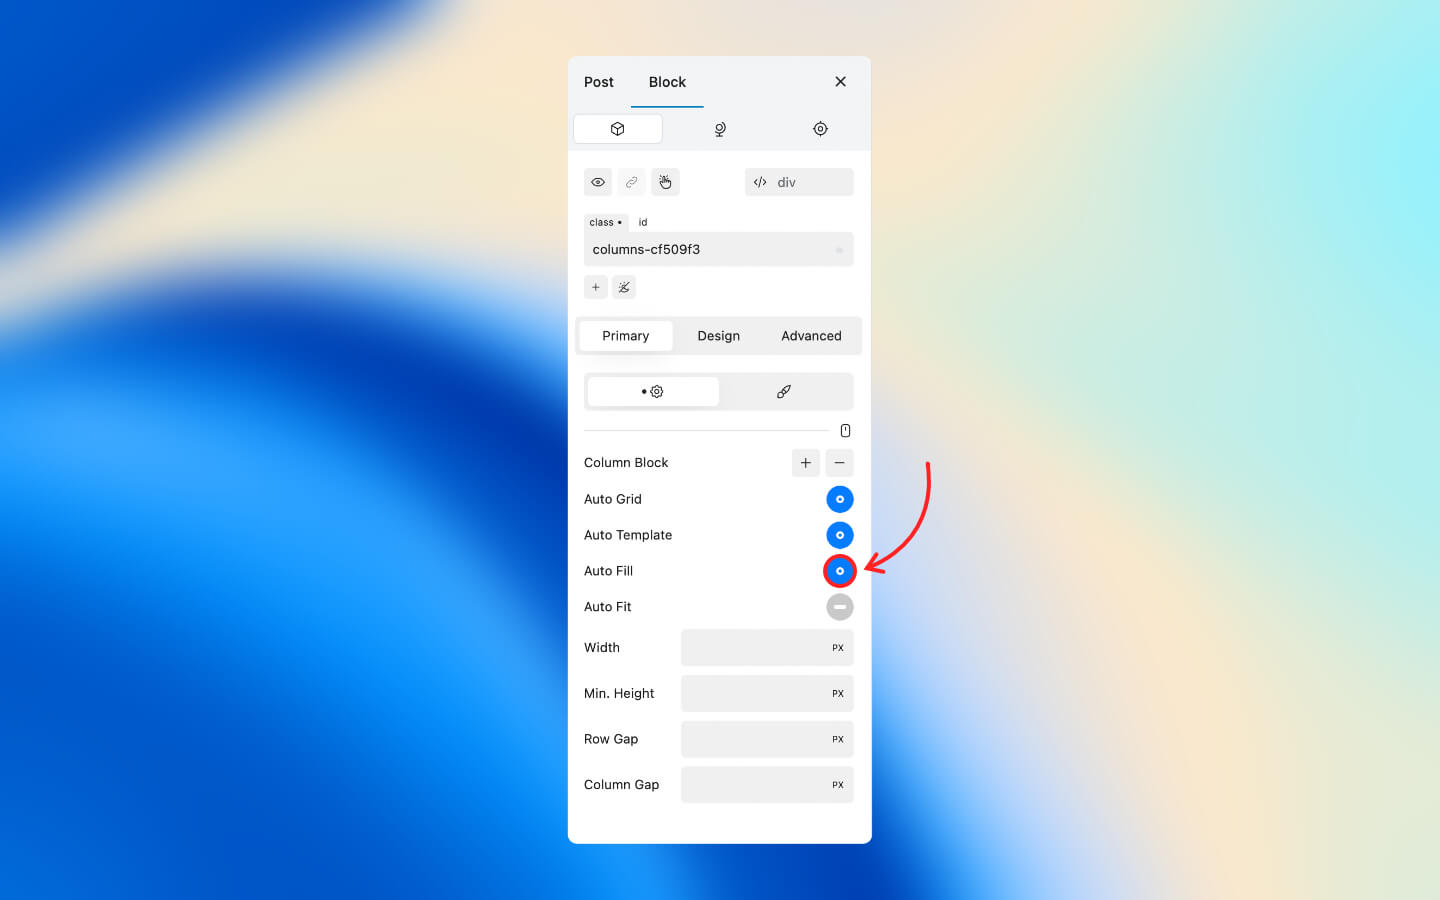
### Auto Fill
The Auto Fill property fills the row with as many columns as it can fit. It creates implicit columns whenever a new column can fit.
* Select a columns block.
* Navigate to the Primary tab of the Block Inspector.
* Open the Settings tab.
* Toggle Auto Fill as required.
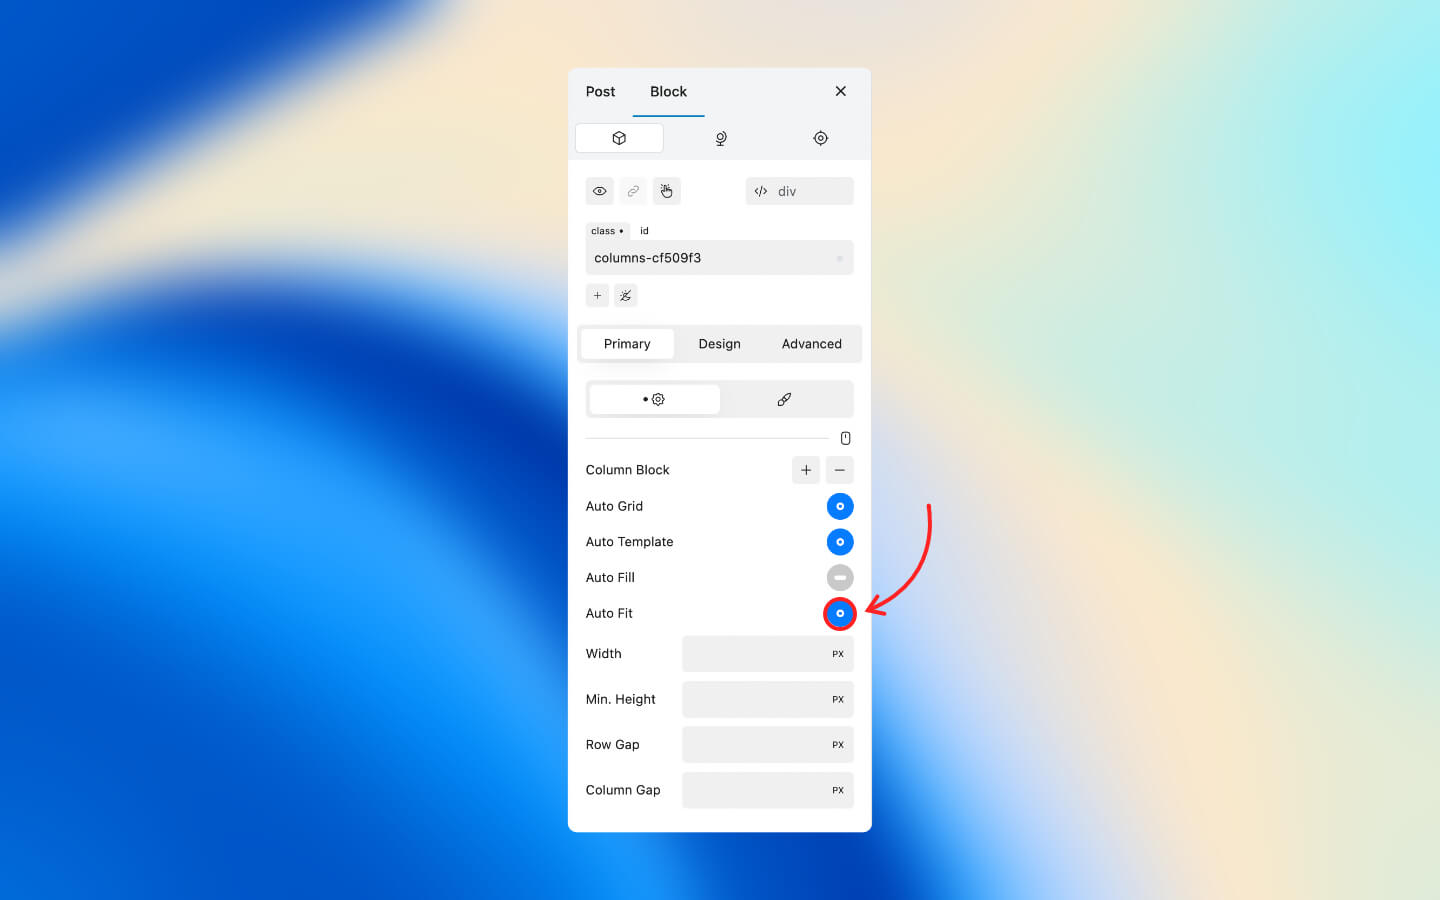
### Auto Fit
The Auto Fit property fits the available columns into the space by expanding them so that they take up all the available space.
* Select a columns block.
* Navigate to the Primary tab of the Block Inspector.
* Open the Settings tab.
* Toggle Auto Fit as required.
## Add/Remove Column
The columns block is a parent block made up of one or more [`column`](https://docs.cwicly.com/blocks/column) blocks.
### Add
* Select a columns block.
* Open Primary tab in the Block Inspector.
* Click "+" icon to add a Column Block.
### Remove
* Select a columns block.
* Open Primary tab in the Block Inspector.
* Open the Settings tab.
* Click "-" icon to remove a Column Block
{% hint style="info" %}
The :heavy\_minus\_sign: button that appears in the `columns` block Primary Tab will only remove the last column (and its contents) in the block..
{% endhint %}
## Minimum Height
The Minimum Height property allows you to specify the minimum height of each column inside the `columns` block.
* Select a columns block.
* Open Primary tab of the Block Inspector.
* Open the Settings tab.
* Find the Minimum Height property.
* Enter the desired value.
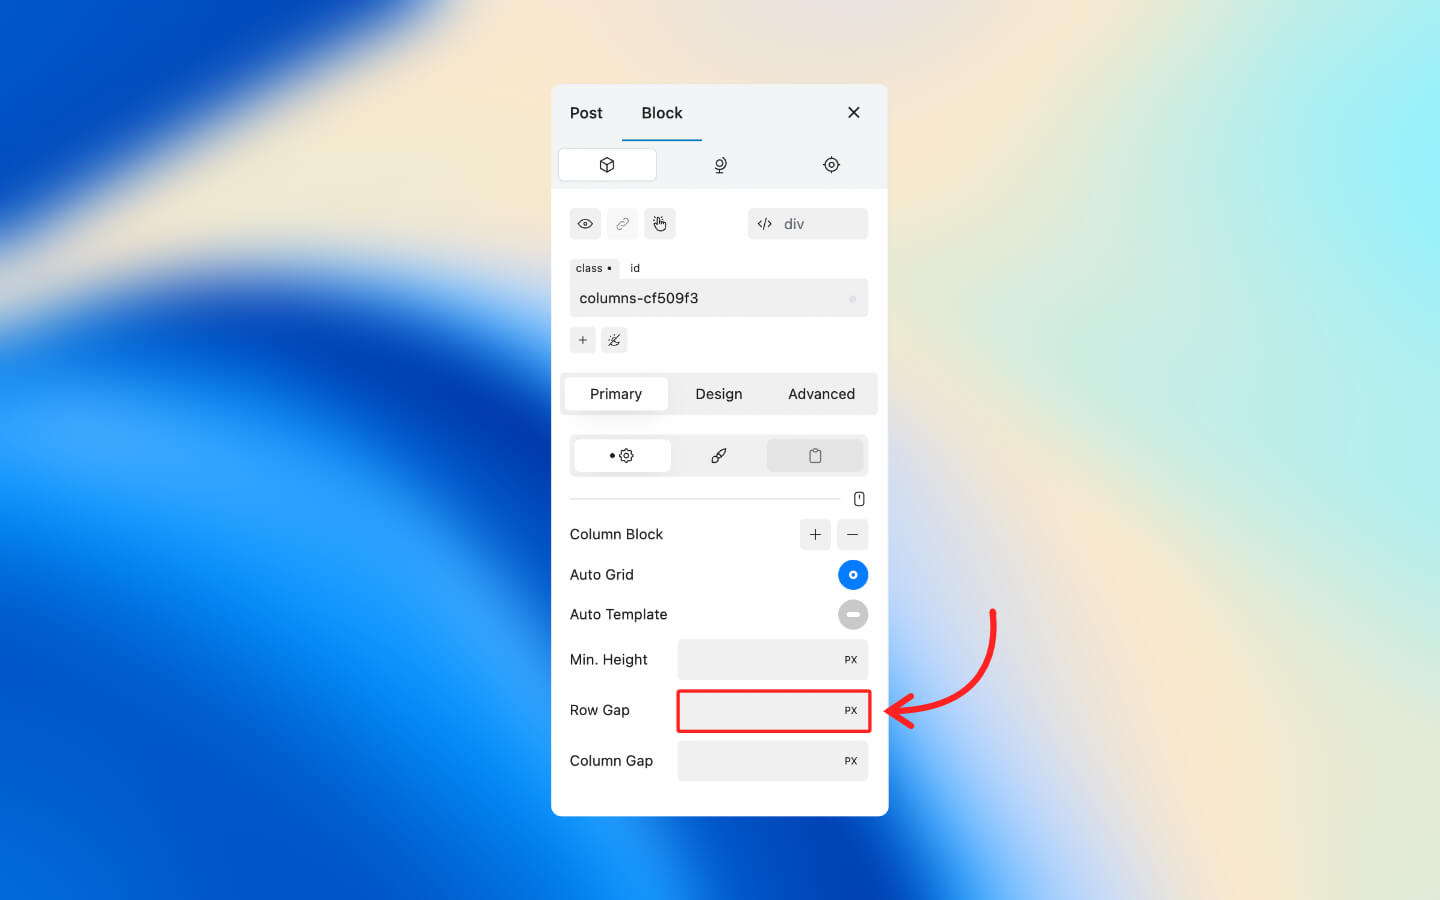
## Row Gap
The Row Gap property allows you to specify the space between every row of columns.
* Select a columns block.
* Open Primary tab in the Block Inspector.
* Open the Settings tab.
* Find the Row Gap property.
* Enter the desired value.
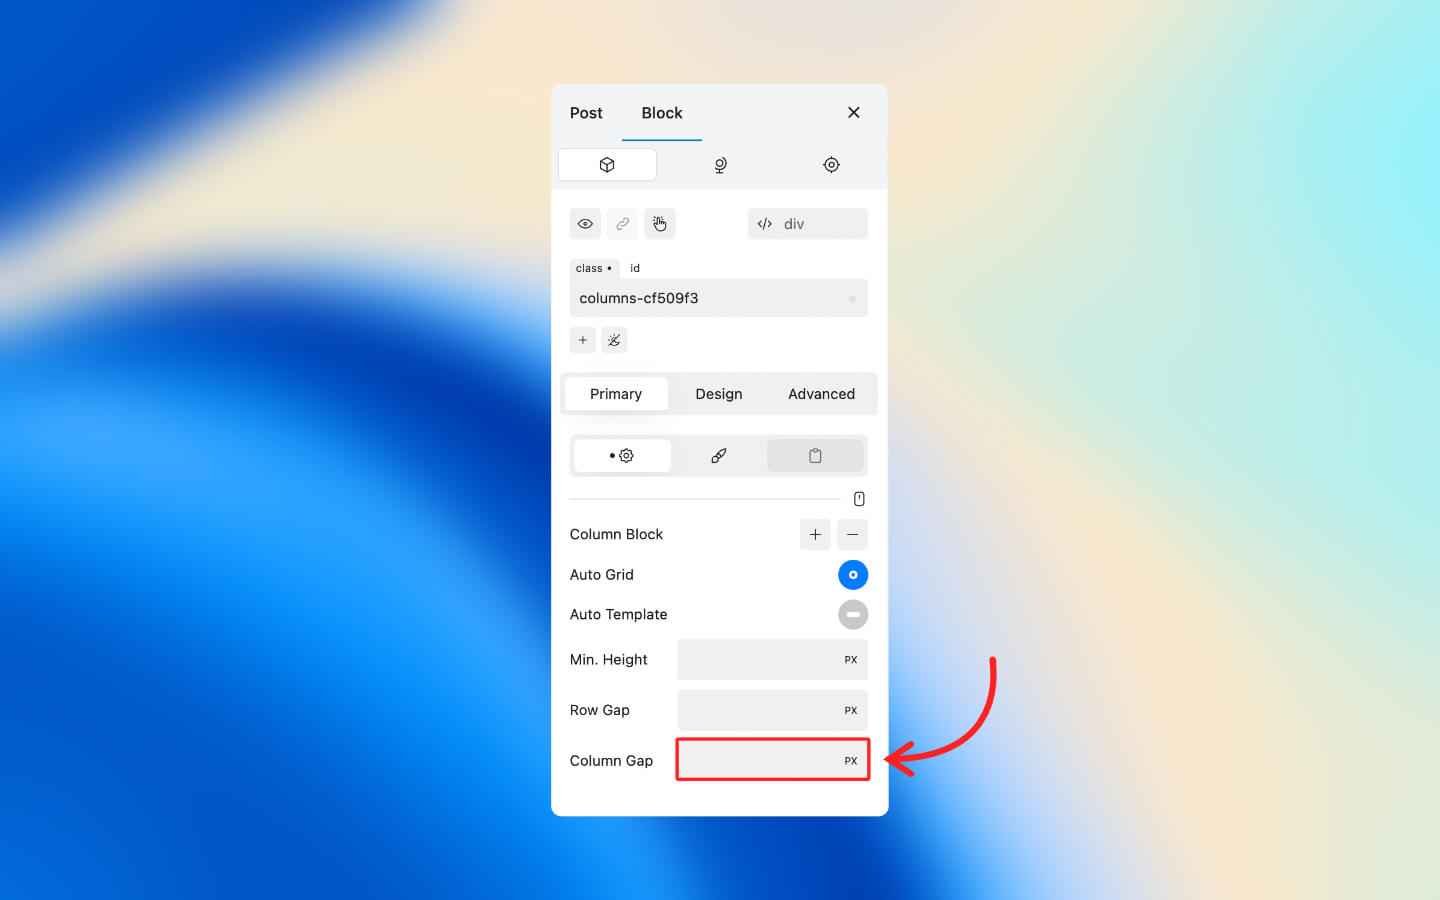
## Column Gap
The Column Gap property allows you to specify the space between every column in a row.
* Select a columns block.
* Open Primary tab in the Block Inspector.
* Open the Settings tab.
* Find the Column Gap property.
* Enter the desired value.